Grow Chives in your Garden: Complete Guide

Chives are one of the easiest herbs to grow, and if you love fresh, homegrown flavors, they’re a must-have in your garden. These hardy perennials come back year after year, require very little maintenance, and add a mild onion-like taste to your dishes. Plus, their bright purple flowers attract pollinators like bees and butterflies, making them a great companion for your vegetable garden.
Whether you’re in the cool northern states, the warm southern regions, or somewhere in between, chives can thrive in most parts of the U.S. They’re super adaptable—perfect for raised beds, garden borders, or even small containers on a sunny windowsill.
In this guide, we’ll walk you through everything you need to know about growing chives, from planting to harvesting and using them in your kitchen. No matter where you live, you’ll have fresh chives at your fingertips in no time!
What Are Chives?
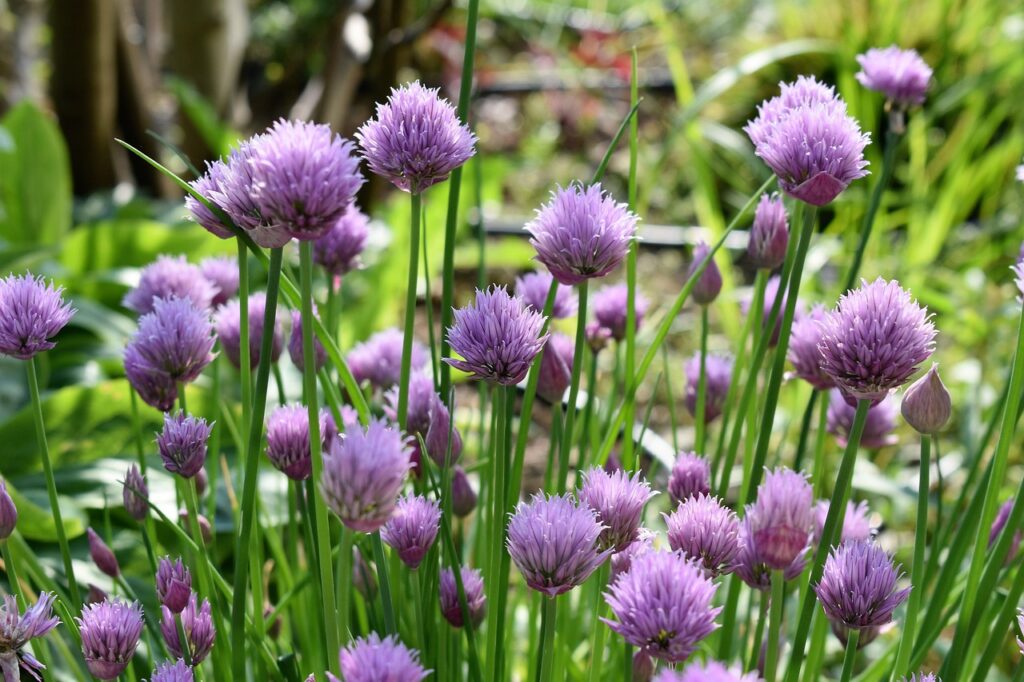
If you love cooking with fresh herbs, chives are a must-have in your garden! But what are chives, exactly? Chives (Allium schoenoprasum) are a type of herb from the onion family, known for their thin, hollow green leaves and mild onion-like flavor. They’re often used to add a fresh, savory touch to dishes like salads, soups, eggs, and potatoes.
Unlike onions, it don’t have a bulb—you harvest the leaves instead. They grow in clumps and are super easy to care for, making them perfect for beginners. Plus, they’re perennials, meaning they come back year after year! In the spring, chives produce beautiful purple flowers that are also edible and can brighten up any dish.
Whether you grow them in your garden or a small pot on your windowsill, chives are a simple, delicious way to add fresh flavor to your meals with almost no effort!
How to grow Chive Seeds?
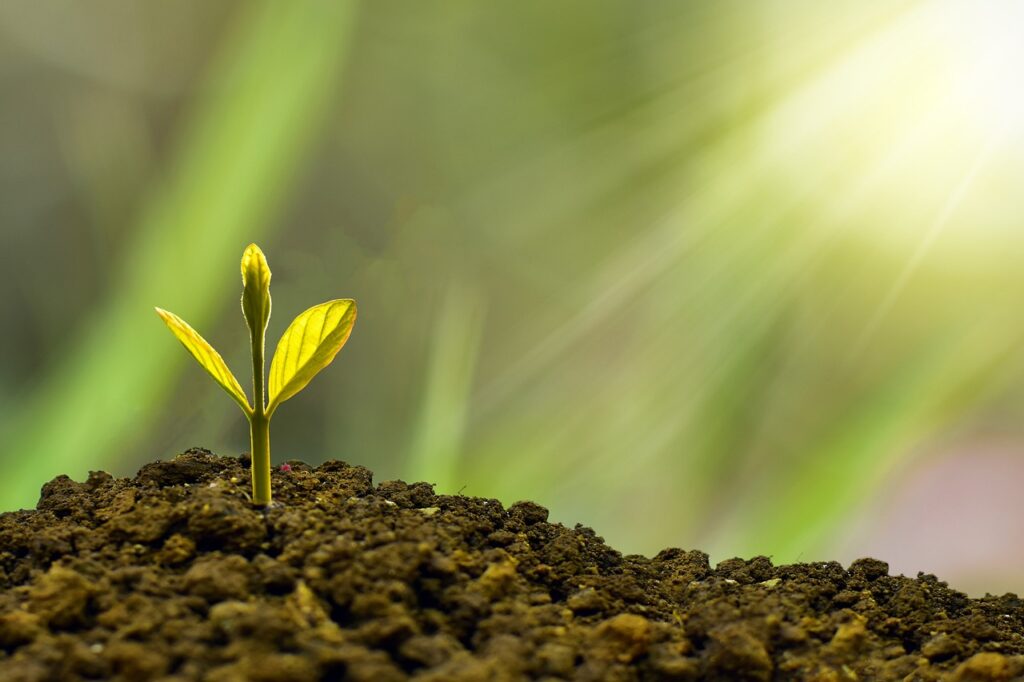
Growing chive seeds is a simple and rewarding process, perfect for beginners and seasoned gardeners alike. To start, choose a sunny spot in your garden or a pot with well-draining soil. Chive seeds thrive in rich, moist soil, so adding compost before planting can help boost growth.
Sow the seeds about ¼ inch deep and lightly cover them with soil. Water gently to keep the soil consistently moist but not soggy. Chive seeds typically take 7 to 14 days to germinate, so be patient and ensure they get enough sunlight.
Once the seedlings reach a few inches tall, thin them out to give each plant enough space to grow. Regular watering and occasional fertilizing with organic compost will keep them healthy. Chives are perennials, meaning they’ll come back year after year, making them a great long-term addition to your herb garden.
You can start harvesting chives once they reach about 6 inches tall. Simply snip the leaves near the base, and they’ll continue growing. Fresh chives add a mild onion-like flavor to dishes, making them a fantastic kitchen staple. With minimal effort, you’ll have a steady supply of homegrown chives for years!
Steps to grow Chive Seeds in your Garden
1- Choose the Right Spot & Prepare the Soil
Picking the right spot is the first step to growing healthy chive seeds. Chives love the sun, so find a place that gets at least six hours of direct sunlight each day. The good news? They’re super versatile! You can grow them in a garden bed, a raised planter, or even a small pot on your patio or windowsill.
Now, let’s talk soil. Chive seeds do best in well-draining, nutrient-rich soil. If your garden soil feels heavy or clay-like, mix in some compost or sand to help with drainage. Adding organic matter like compost or aged manure also gives the soil a nutrient boost, which helps chives grow strong and healthy.
Before planting, loosen the soil about 6 to 8 inches deep and clear out any weeds or debris. This gives the chive seeds plenty of space to establish roots. After sowing, gently water the area to keep the soil moist—but don’t overdo it! Too much water can cause the seeds to rot.
With just a little prep, you’ll be on your way to growing fresh, flavorful chives that keep coming back year after year.
2- Choose the Right Spot & Prepare the Soil
Planting chive seeds is easy and doesn’t take much time. Once you’ve picked the perfect sunny spot and prepared the soil, it’s time to sow your seeds.
Start by sprinkling the chive seeds evenly over the soil. Since they’re tiny, you don’t need to bury them too deep—just cover them lightly with a thin layer of soil, about ¼ inch. Give them a gentle watering to keep the soil moist, but be careful not to flood them. Chive seeds like consistent moisture to germinate, so keep an eye on the soil and water lightly when it starts to dry out.
Germination usually takes between 7 and 14 days, so be patient! If you’re planting chives in a garden bed, space the seeds about 6 inches apart to give them room to grow. In containers, make sure the pot has good drainage and enough space for the roots to spread.
Once the seedlings sprout, continue watering them regularly and remove any weeds that pop up. With just a little care, your chive seeds will soon grow into healthy, flavorful herbs that you can harvest and enjoy for years to come!
3- Chive Plant Care: Sun, Soil & Watering Needs
Caring for chives is easy, making them a perfect herb for any gardener. These hardy plants thrive in full sun, so choose a spot that gets at least six hours of direct sunlight daily. While chives can tolerate some shade, they grow best with plenty of sunshine.
When it comes to soil, chives aren’t too picky but prefer well-draining, nutrient-rich soil. If your soil is heavy or clay-like, mix in some compost or sand to improve drainage. A slightly acidic to neutral pH (around 6.0–7.0) works best. Adding organic compost occasionally will help keep your chive plants healthy and productive.
Watering chives is simple—keep the soil consistently moist but not soggy. They don’t like to dry out completely, but overwatering can lead to root rot. A good rule of thumb is to water when the top inch of soil feels dry. If growing chives in pots, make sure the container has drainage holes to prevent excess moisture buildup.
With proper sun, well-prepared soil, and the right watering routine, your chive plants will thrive and provide a fresh, flavorful harvest for years to come. Plus, they’re perennials, so they’ll keep coming back season after season!
4- Caring for Your Chives
Taking care of chives is simple, and with just a little effort, they’ll keep growing fresh and flavorful year after year. Here’s how to keep them healthy:
Fertilizing – Chives don’t need much fertilizer, but giving them a boost can encourage strong growth. Apply a balanced, organic fertilizer once or twice during the growing season. If you prefer a natural approach, compost or diluted fish emulsion works great.
Mulching – Adding a thin layer of mulch around your chive plants helps retain moisture, suppress weeds, and protect the roots. Use organic mulch like straw, grass clippings, or shredded leaves. In colder climates, extra mulch in the winter helps chives survive frost.
Pruning – Regular harvesting is the best way to keep chives growing strong. Snip the leaves about an inch above the soil when they reach 6 inches tall. This encourages fresh, tender growth. If chives start producing flowers, trim them off unless you want seeds for replanting.
With the right care, chives will thrive with minimal effort. Just fertilize occasionally, mulch for protection, and prune regularly, and you’ll have a steady supply of this delicious herb all season long!
5- How to harvest chives?
Harvesting chives is super easy, and the more you cut them, the more they grow! Once your chive plants reach about 6 inches tall—usually around two months after planting—you can start snipping and enjoying them.
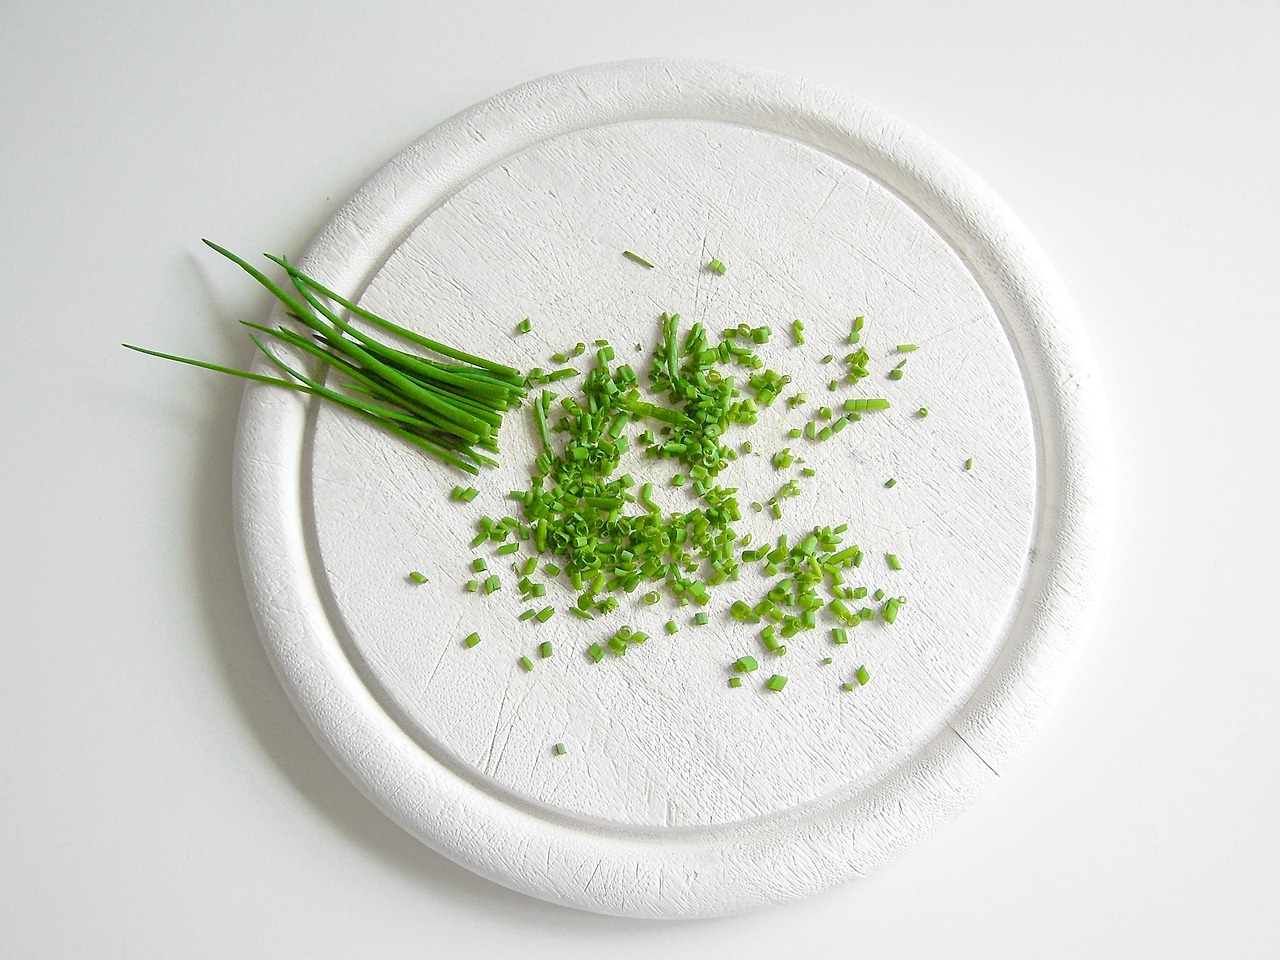
To harvest chives, grab a clean pair of kitchen scissors and cut the leaves about an inch above the soil. Try not to pull them out by hand, as this can damage the roots. The key is to leave some of the plant intact so it keeps growing. Since chives bounce back quickly, you can harvest them multiple times throughout the season.
For the best flavor, pick chives in the morning when their oils are most concentrated. If you see flowers starting to form, you can either trim them off to encourage more leaf growth or leave them if you want to collect seeds later.
Fresh chives taste best right after harvesting, but if you have extras, you can store them in the fridge for about a week or freeze them for longer use. With a little care, your chive plants will keep producing delicious, homegrown herbs for years to come!
6- How to Cut Chives?
Cutting chives the right way helps keep your plants healthy and ensures they keep growing strong. Whether you’re harvesting for cooking or trimming to encourage new growth, here’s the best way to do it.
To cut chive, use clean kitchen scissors or garden shears. Simply snip the leaves about an inch above the soil. Avoid pulling or yanking on the plant, as this can damage the roots. Always leave at least a third of the plant behind so it can continue growing.
The best time to cut chive is in the morning when the leaves are fresh and full of flavor. If your chive plant starts flowering, you can trim off the blossoms to keep the leaves growing. However, if you love the look of chive flowers or want to collect seeds, feel free to let some bloom.
Once cut, chives can be used fresh, stored in the fridge for about a week, or frozen for later use. Regular cutting encourages healthy growth, so don’t be afraid to trim often. With the right technique, your chive plant will keep producing flavorful, homegrown herbs all season long!
7- Winter Care for Chives
Chives are hardy perennials, which means they can survive the winter and come back year after year. But giving them a little extra attention during the colder months will keep them strong and ready to grow again in spring. Here’s how to handle winter care for chives.
If you live in an area with mild winters, your chives might stay green year-round. However, in colder climates, they’ll go dormant once the temperature drops. Don’t worry—this is completely normal! To protect your chive plants, add a layer of mulch, such as straw, dried leaves, or compost, around the base. This helps insulate the roots and prevents deep freezing.
If you want to enjoy fresh chives in winter, consider potting a few plants and bringing them indoors. Place them near a sunny window and water sparingly to keep the soil slightly moist. Chives don’t need much fertilizer in winter since they grow slower.
Once spring arrives, remove any dead growth and give the plants a light trim to encourage fresh shoots. With the right winter care, your chives will bounce back quickly, ready to provide another season of flavorful, homegrown goodness!
8- Storing Chives
If you have more chives than you can use right away, don’t worry—there are easy ways to keep them fresh! Storing chives properly helps preserve their flavor so you can enjoy them later.
For short-term storage, wrap freshly cut chives in a damp paper towel and place them in a resealable bag or airtight container in the fridge. This keeps them fresh for about a week.
For longer storage, freezing is the best option. Chop the chives into small pieces and spread them on a baking sheet to freeze individually. Once frozen, transfer them to a freezer-safe bag. You can also freeze chives in ice cube trays with a little water or olive oil for easy use in soups and sauces.
Drying chives is another option, but it can reduce their flavor. Whether fresh or frozen, storing chives the right way ensures you always have this tasty herb ready to use!
Conclusion
Growing chives is one of the easiest and most rewarding things you can do in your garden. From planting seeds to harvesting, cutting, and storing chives, the whole process is simple and doesn’t take much effort. With just a little care, you’ll have a fresh supply of this flavorful herb all year long!
The best part? Chives keep coming back season after season. Just give them enough sun, water, and the occasional trim, and they’ll thrive. Whether you’re using them fresh, freezing them for later, or bringing a pot indoors for winter, you’ll always have homegrown chives ready to sprinkle over your favorite dishes.
So, if you’re looking for a low-maintenance herb that adds great flavor to your meals, chives are a perfect choice. Take care of them, and they’ll keep rewarding you with fresh, delicious greens for years to come. Happy growing!
Frequently Asked Questions
Chive seeds typically take 7 to 14 days to germinate, depending on soil temperature and moisture levels. Keeping the soil moist but not soggy helps speed up the process.
Chives like consistently moist soil, so water them when the top inch of soil feels dry. Avoid overwatering, as too much moisture can cause root rot.
You can start harvesting chives when they reach about 6 inches tall. Use clean scissors to cut the leaves about an inch above the soil. Regular harvesting encourages new growth.
Yes! Chives are hardy perennials. In cold climates, they go dormant, but adding a layer of mulch helps protect their roots. You can also grow them indoors for fresh chives year-round.
For short-term storage, wrap chives in a damp paper towel and keep them in the fridge. For long-term storage, chop and freeze them in a freezer bag or ice cube trays with water or oil.
Chives don’t need much fertilizer, but adding compost or a balanced organic fertilizer once or twice during the growing season helps keep them healthy and productive.
Table of Contents
- Grow Chives in your Garden: Complete Guide
- What Are Chives?
- How to grow Chive Seeds?
- Steps to grow Chive Seeds in your Garden
- 1- Choose the Right Spot & Prepare the Soil
- 2- Choose the Right Spot & Prepare the Soil
- 3- Chive Plant Care: Sun, Soil & Watering Needs
- 4- Caring for Your Chives
- 5- How to harvest chives?
- 6- How to Cut Chives?
- 7- Winter Care for Chives
- 8- Storing Chives
- Conclusion
- Frequently Asked Questions